Creating Sahha Webhooks and capturing events using Node.js and Express
Webhooks are a powerful way to receive real-time updates about specific events from various services. When it comes to Sahha, a platform focused on health data analytics, setting up webhooks allows you to capture important events and take action on them immediately. In this tutorial, we'll walk you through the process of creating Sahha webhooks and setting up an Express server to capture these events efficiently.
Prerequisites
Before we dive in, make sure you have the following:
- Node.js and npm: Ensure that you have Node.js and npm installed on your machine. You can download them from here.
- Express.js: We will use Express.js, a popular web framework for Node.js, to set up our server.
- Sahha Account: You need a Sahha account to create webhooks. If you don’t have one, sign up for free on the Sahha dashboard.
Set Up Your Project
First, let's create a new directory for our project and initialize it:
mkdir sahha-webhooks cd sahha-webhooks npm init -yNext, install the following dependencies:
npm install express body-parser dotenv nodemonDependencies explained:
express: A web framework for Node.js that simplifies the creation of web servers and APIs. It provides a robust set of features for web and mobile applications.body-parser: Middleware for parsing incoming request bodies in a middleware before your handlers, available under thereq.bodyproperty. It is commonly used to parse JSON and URL-encoded data.dotenv: A module that loads environment variables from a.envfile intoprocess.env. This helps manage configuration variables in a single place, keeping them secure and out of your codebase.nodemon: A utility that monitors changes in your source files and automatically restarts your Node.js server. It is particularly useful during development to save time and avoid manually restarting the server after each change.Create your webhook in the Sahha Dashboard
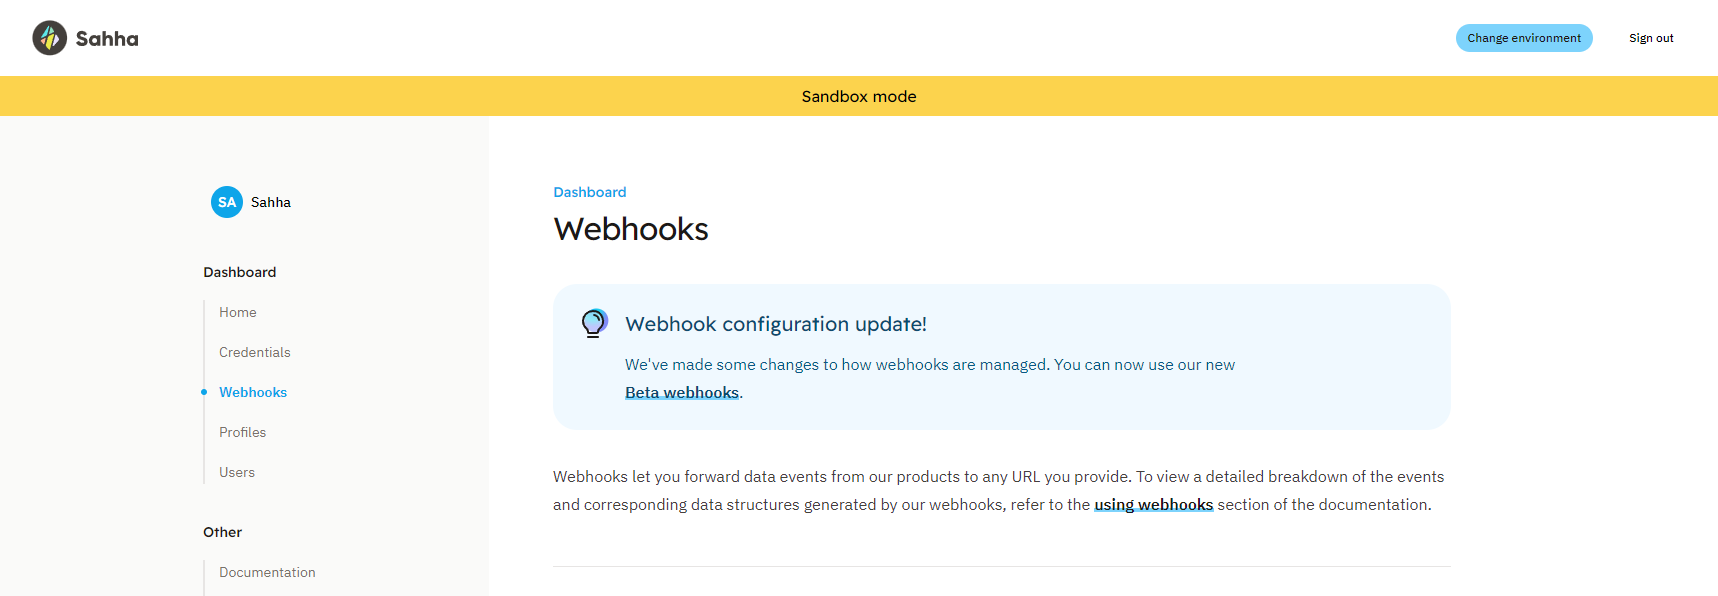
Before we continue setting up our server, we need to create a webhook in the Sahha dashboard. If you haven’t already you will need to create a free Sahha account and sign in. Once you have signed in to your Sahha account, navigate to the webhooks section.
💡 Currently the webhooks we are going to create are a beta feature. If you are from the future, your page may look slightly different.
Once you have found your way to the webhooks page, click the link in the callout at the top of the page to use the beta webhooks.
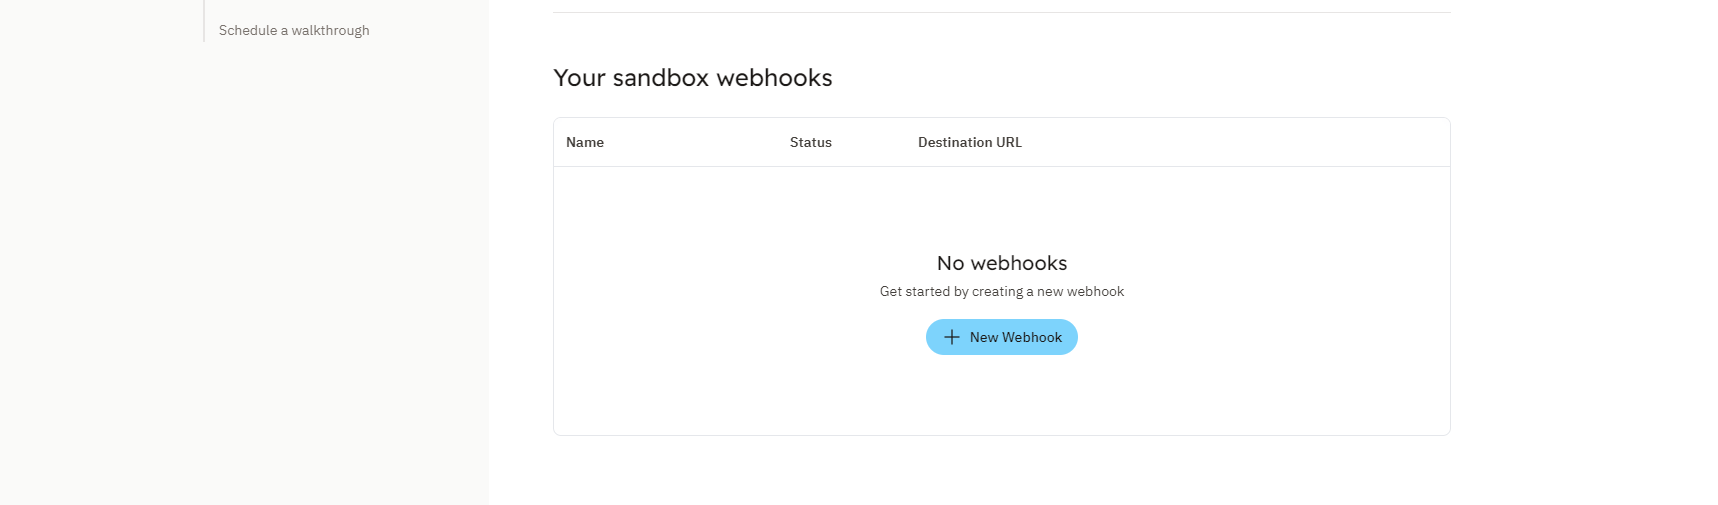
You will then want to click the “New webhook” button.
On the create screen, you will need to give your webhook a name, and select which events you want to subscribe to.
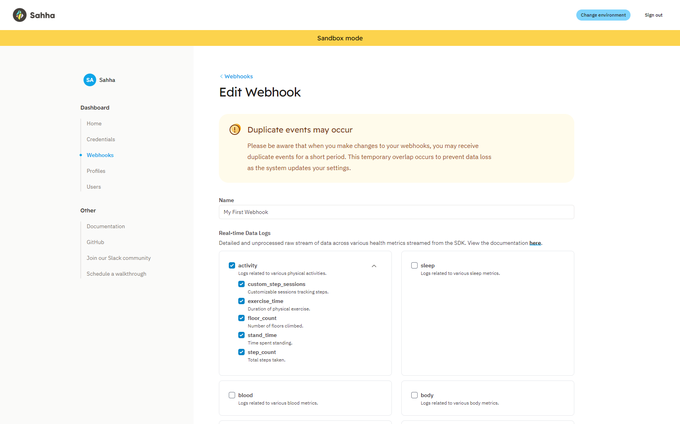
For this tutorial we are going to call our webhook “My FirstWebhook” and subscribe to the activity real-time data logs. More information about the events can be found in the webhooks section of the Sahha Documentation.
Next we need to set the URL we want the webhook to forward events to. For development purposes we will use Ngrok. Ngrok is a tool that creates a secure tunnel from a public URL to your local web server, allowing you to expose a local server to the internet. More information about how to install and use Ngrok can be found here. Once you have Ngrok up and running simply copy and URL from Ngrok and append “/webhook” to the end of it.
Once you have added your URL, you will want to copy your secret as we will need it on the server to validate the webhook signature later in the tutorial.
💡 You can access your secret from the “edit” screen if you forget to copy it, or misplace it.
Once you have filled all the required fields of the create form, simply click the “Save webhook” button and your webhook will be created and you will be navigated back to the list view.
Set up environment variables
Back in your express application, create a file name
.envin the root of your project and add the following variableSAHHA_WEBHOOK_SECRET=REPLACE_THIS_WITH_YOUR_SECRETCreate the Express Server
Create a file named
server.jsin your project directory and add the following code:javascript
// Import required dependencies const express = require("express"); const bodyParser = require("body-parser"); const crypto = require("crypto"); require("dotenv").config(); // Importing and configuring dotenv to load environment variables from a .env file const app = express(); // Creating an Express application const PORT = process.env.PORT || 3000; // Setting the port from environment variable or default to 3000 const secret = process.env.SAHHA_WEBHOOK_SECRET; // Retrieving the secret key for webhook validation from environment variables // Middleware to parse JSON bodies app.use(bodyParser.json()); // Define a POST endpoint to receive webhook events app.post("/webhook", (req, res) => { // Retrieve the X-Signature header from the request const signatureHeader = req.headers["x-signature"]; if (!signatureHeader) { return res.status(400).send("X-Signature header is missing."); } // Retrieve the X-External-Id header from the request const externalIdHeader = req.headers["x-external-id"]; if (!externalIdHeader) { return res.status(400).send("X-External-Id header is missing."); } // Retrieve the X-Event-Type header from the request const eventTypeHeader = req.headers["x-event-type"]; if (!eventTypeHeader) { return res.status(400).send("X-Event-Type header is missing."); } // Convert the request body to a JSON string const payload = JSON.stringify(req.body); // Compute the HMAC SHA-256 signature based on the secret key and payload const hmac = crypto.createHmac("sha256", secret); const computedHash = hmac.update(payload).digest("hex"); // Compare the received signature with the expected signature if (signatureHeader !== computedHash) { return res.status(400).send("Invalid signature."); } // Log the body of the webhook console.log("Webhook received:", req.body); // Respond with a 200 OK status to acknowledge receipt of the webhook event res.status(200).send("Ok"); }); // Start the server and listen on the specified port app.listen(PORT, () => { console.log(`Server is running on port ${PORT}`); });Once you have your
server.jsfile set up open a terminal in the project directory and run the following command to start your server:nodemon server.jsYou should then see the
console.log”Server is running on port 3000” in your terminal and we are ready to start receiving events.Testing the server
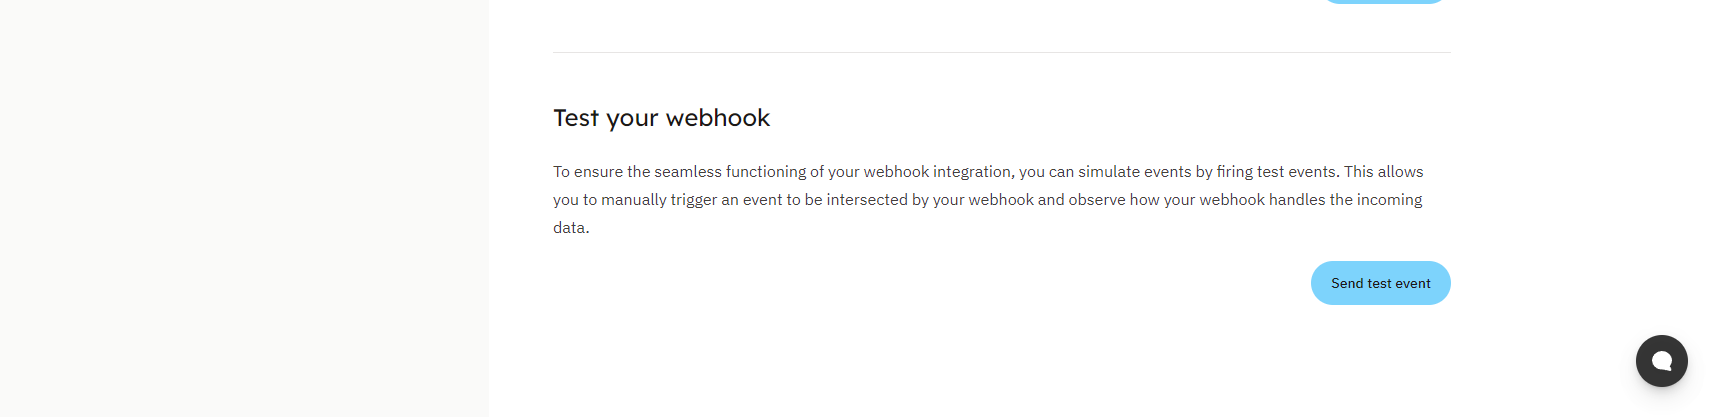
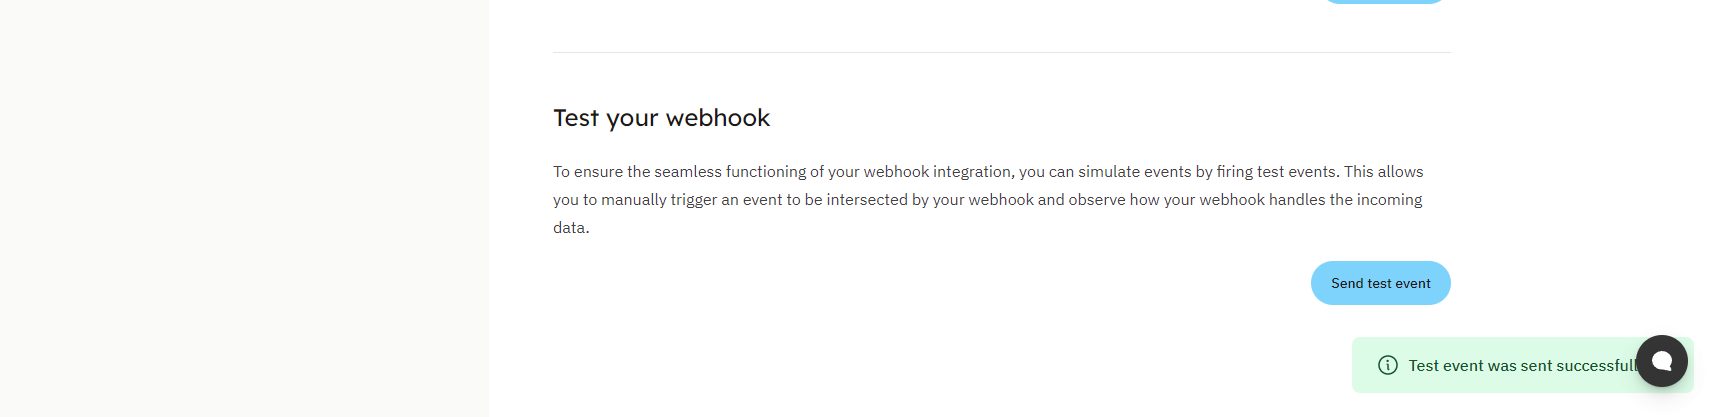
Now that the server is up and running and ready to receive events, we can test it by sending a test event from the bottom ‘edit’ screen of you webhook in the Sahha dashboard.
Simply click the “Send test event” button, if everything works as expected you should see a toast message explaining your test event was sent successfully
In the terminal your server is running on, you should see the following output:
json
Webhook received: { logType: 'activity', requestId: 'b45625e0-a131-406c-80d7-3ce488c111de', profileId: '2e3c73d0-f604-43b8-855e-4589b0e37b12', accountId: 'de503a85-d84d-4afa-933b-1119bf4f9714', externalId: 'ebe939d5-14cf-48dc-ac54-e86be380919f', receivedAtUtc: '2024-04-29T04:21:29.1261616+00:00', healthLogs: [ { id: '708b2037-0097-4b60-814a-1ffb2342e6df', parentId: '', logType: 'activity', dataType: 'custom_step_sessions', value: 50, unit: 'count', source: 'IHealth X', recordingMethod: 'RECORDING_METHOD_UNKNOWN', deviceType: 'iHealth13,2', startDateTime: '2024-04-29T00:00:00+12:00', endDateTime: '2024-04-29T00:20:00+12:00', additionalProperties: {} } ] }
💡 Don’t worry if the test event does not line up with the events you subscribed to, currently the webhook test functionality is only set up to send a single static event.
Conclusion
Congratulations! You've successfully set up a webhook in Sahha and captured events using an Express server. This process allows you to receive real-time updates about specific events, empowering you to take immediate action based on the data you receive.
By following this tutorial, you have:
With this foundation, you can expand your server to handle different types of events and perform more complex actions based on the data you receive. Integrating webhooks into your application can significantly enhance its functionality by providing timely and relevant data.
Feel free to explore the Sahha documentation further to discover more about the events you can subscribe to and other ways you can utilize Sahha's powerful health data analytics.